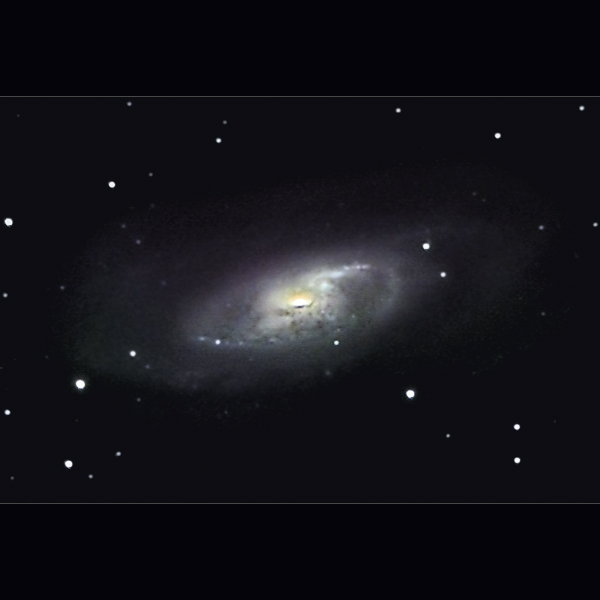
There is a massive black hole at the center of M106 and all the gaseous clouds and stars systems in its vicinity are being sucked into its maw. The two major arms of the galaxy look peaceful enough, but the sharp, bright glow of the nucleus comes from the superheated ionized gas that is spiraling into M106's black hole. Most spiral galaxies, including ours, are thought to harbor a supermassive black hole, but M106's is particularly active.
Visually, M106 is a very challenging object but don't let that stop you from photographing it. The detail that is so difficult to detect at the eyepiece is glaringly obvious in long-exposure photographs. Unlike the beautiful patterns of M63, however, the detail in M106 is more chaotic and asymmetric. I confess that it took me a while to appreciate its charm, but suspect that this will be an object that I will return to again and again.
Capturing M106
The month of March is Galaxy Month. There are more than a dozen Messier galaxies in the area around Canes Venatici and Coma Berenices. M106 is under the handle of the Big Dipper along with M51, M63, and M94. To find this galaxy I usually start at γ (gamma) Ursa Majoris, which is the bottom-of-the-bowl star on the Dipper closest to the handle. From there you can go south-east to M106. The stars around M106 are very faint, so you will need to adjust the histogram for the DSI's live preview until you can see the faintest stars possible. With the live image at 1 second per exposure I was able to see M106 as a fuzzy star, almost the brightest thing in the area (which is not saying much).
The core and arms of M106 are reasonably bright, so you should be able to get a good image at 30 seconds per exposure. Nevertheless, if your polar-alignment is good, it is worth going to 1 minute (or more) per exposure. Unlike M94, the extended nebulosity around M106 is not that interesting, so you only need to capture until you have enough signal in the arms. For the image above I exposed for a total of 150 minutes, but I got a pretty good image after about 120 minutes (by contrast, M94 required almost double that amount).
Processing the Image
I generated a working luminance plane from the RGB image by copying the green channel over the blue channel (because the blue channel is noisy), nudging the red channel one pixel to align it better with the green channel, and then desaturating the image (which just averages out the three channels into a single grayscale image).
I then processed the luminance plane in three different ways: To enhance the central core, I took a copy of the luminance plane and sharpened it severely (ignoring the fact that this introduced noise at the edges). To enhance the arms, I took another copy and use the Adjust/Curves command to bring out detail in the arms (ignoring the resulting overexposed core). To enhance the outer nebulosity, I took a third copy and used Adjust/Levels to severely brighten the extended nebulosity. I then blurred the result to get rid of the resulting noise.
Once I had processed these three different regions differently, I used Layer Masks to combine the three into a single luminance image. Use your best judgment to adjust the relative intensities of the three regions. I started with a prominent extended nebulosity, but later toned it down as I realized that I didn't have enough signal in the original image.
Once combined, you can make further adjustments to taste, such as enhancing the contrast a bit, or sharpening.
As always, I adjusted the color by consulting a reference image. I used both the Adjust/Color Balance command and the Adjust/Curves command (on separate channels).

