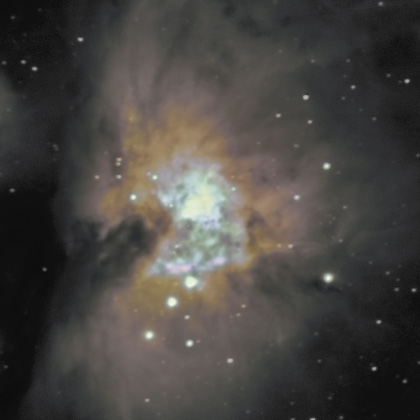
What would the Orion Nebula look like if we could see it up close? Probably nothing like the image above. The human eye is probably not sensitive enough to see M42's winged mantle of nebulosity, even if we got a lot closer. The nebula would get brighter as we got closer, but it would also get larger. Its light would spread out over a larger area and be just as hard to see. Most likely, any future astronaut-tourists would only see the central core of the nebula, where newborn stars have carved out a diaphanous web of illuminated gasses.
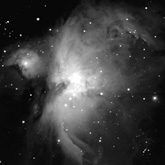
Below I've reprocessed (and magnified) the image above to bring out the detail in the central core. The delicate filaments of gasses are just barely visible. I've also adjusted the colors to be closer to what the human eye would see, because my camera is disproportionately sensitive to red and infrared light.
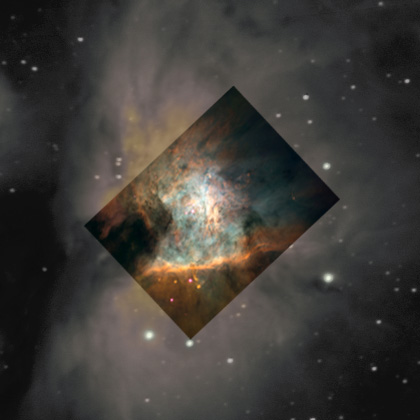
And just for comparison below is the central core as captured by the Hubble Space Telescope. Note that the original Hubble image has ten or twenty times the resolution shown here—enough to show the dusty disks of newborn solar systems.
Processing Technique
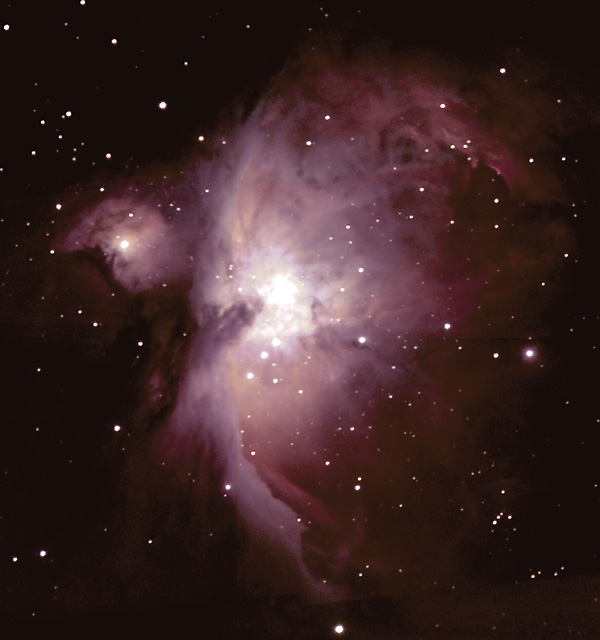
With only a quarter-million pixels, the Deep Sky Imager lacks the resolution of the more capable (and more expensive) SBIG cameras. But for a large target like the Orion Nebula, I can create a mosaic to capture a larger area with greater resolution.
For this image of the Orion Nebula I captured seven separate images with the DSI, each a stack of 50 x 21.2 second exposures (more than fifteen minutes per image).
Using the techniques described here, I converted the original FITS files to TIFF and adjusted the histogram in Adobe Photoshop.
I had a lot of problems getting the colors to match up from image to image. I ended up with a few seams where the color changes abruptly. In the future I will try to stitch each color channel separately to insure consistency across the image.