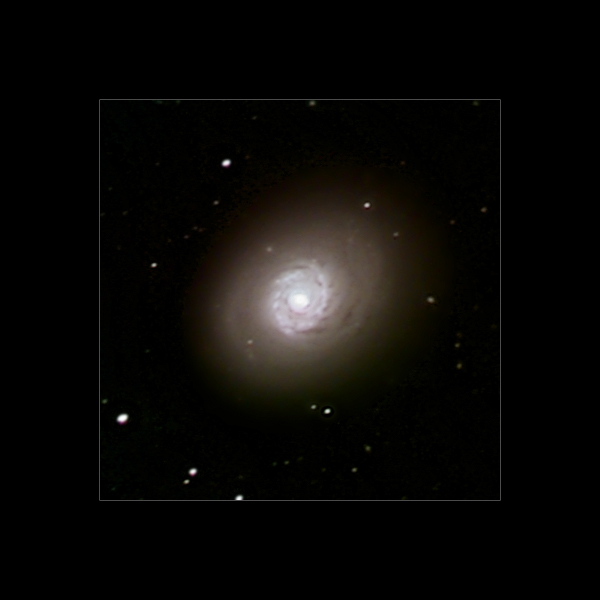
The bright and compact arms of M94, the Croc's Eye Galaxy, contrast beautifully against the dim and subtle dust clouds of the galaxy's disk. Though not as bright or beautiful as the Sunflower Galaxy, there is a wealth of subtle detail in M94's dusty disk.
Capturing M94
M94 is near M63 and M51 in the sky and appears high in the sky during Spring. I usually start at η (eta) Ursa Majoris (the last star in the handle of the Big Dipper) and move south-west on the map, past M51 and M63. More experienced observers might prefer starting at α (alpha) Canes Venatici, however. M94 barely appears as a fuzzy star in the DSI's live image at 1 second per exposure. There are a couple of moderately bright stars in the region that you can use as reference.
One of the challenges in capturing M94 is getting enough data for the dim outer edges of the galaxy. I used my 8" Schmidt-Newtonian at f/4, even though the galaxy is somewhat small. At first I tried stacking 30 second exposures, but I soon realized that I was not getting much of the extended edges. My next attempt was at 1 minute per exposure and that worked out better. Even so, I had to stack four hours worth of light for my image.
Note that M94 has an even fainter outer ring of stars (not visible in my image). If you have darker skies than Cambridge (likely) or can stack longer exposures, you might try to capture this extended ring.
Processing the Image
The challenge in processing M94 is the large dynamic range of the galaxy. The nucleus is very bright and easily overexposed, while the extended dusty disk needs serious work on the histogram. I used the Layer Mask technique to stretch the histogram of the core separately from the edges.
To process the core, use the Levels command to bring up the black level, but don't touch the white level (which is already clipping). Use the Curves command to increase the contrast inside the core. Make sure that the clipped portion of the core (the portion that is at maximum brightness) is as small as possible.
To process the extended edges, use the Levels command to set both the black level and the white level. Then use the Curves command to increase the contrast and brightness of the edges. Because we're going to use a Layer Mask, don't worry if the core looks overexposed here. Don't go too far, however—make sure that the edges are distinctly fainter than the core.
Once you've got both the core and the extended edges, combine the two so that you get a good (properly exposed) core and bright outer edges. At this point I generally start working on the luminance and the color separately.
I used the Unsharp Mask command to sharpen the luminance layer. The core and arms are bright and thus can be heavily sharpened (assuming you have enough exposure time), but the extended edges are generally dim and full of noise. The best option is to use a Layer Mask again to sharpen just the core and arms while leaving the edges alone. Experimentation is best.
To process the color layer I adjusted the color balance to match a reference image and then increased the saturation a bit. Next, I blurred the color layer a few pixels to smooth out any color noise.