I took some pictures of Saturn on Sunday. The result is not impressive, even by the standards of amateur astronomy, but it's the best image of Saturn that I've made and I hope to improve.
If nothing else, the image above demonstrates that you can take some pretty good pictures with modest equipment. To generate the image above I started by taking dozens of digital photos of Saturn. Each photo was captured using my Olympus D40Z digital camera. While far from ideal for astrophotography, the D40Z, like most mid-range digital cameras, can produce good pictures of the moon and planets with a very low learning curve. For a telescope I used my old 8" Meade 2080 SCT. The 2080 series is an old telescope that came out before the LX series. It has a clock-drive, but no controller and no go-to computer. The mount is just the Meade equatorial wedge on top of an aluminum tripod.
The camera is attached to the eyepiece using an Orion SteadyPix universal camera mount. Some digital cameras have a threaded lens barrel which can be attached directly to the eyepiece with a small ring adapter. Unfortunately, the Olympus is not one of them and so the universal camera mount holds the camera just above the eyepiece. The hardest part is aligning the camera correctly. Any deviation from focal plane will result in no image. I've found it best to adjust the alignment while the telescope is pointed at a bright, extended target (such as the moon).
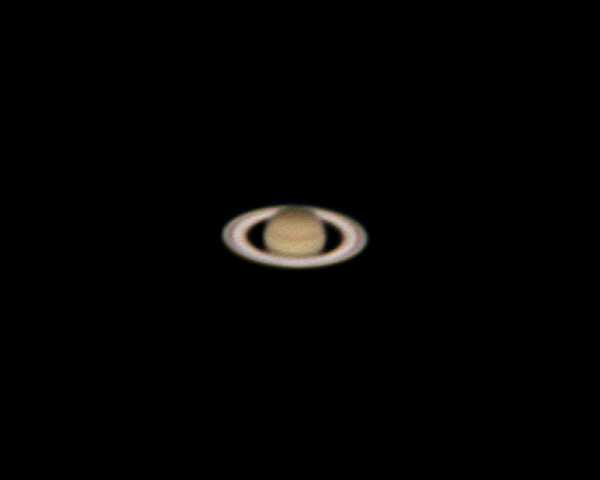
 The only other trick is to take as many pictures as possible. Many amateurs use a web cam and take thousands of frames. What they lose in resolution they gain back by stacking. Since I am not quite as patient yet, I only took a few dozen pictures. The raw images are not very impressive, but of the dozens that I took I selected the best. I ended up with 19 that showed the best detail. Nevertheless, most of the images (like the one on the left) showed only faint detail.
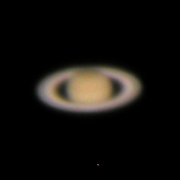
The next step is to stack the 19 images. The most obvious enhancement that the raw image needs is sharpening. Unfortunately, a single raw image has a lot of noise in it and sharpening a single image will not bring out much more detail because the noise will overwhelm it. Stacking is a way of digitally adding up all the images. Since the noise is random, the different noise patterns on each raw image will cancel out. Conversely, the detail in the image is not random and will be reinforced.
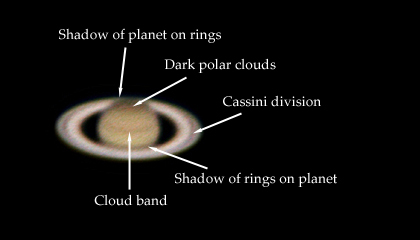
Once stacked, you end up with a blurry, but smooth (i.e., not noisy) image. Now it's a simple matter of sharpening the image in Photoshop and adjusting the levels and contrast. As you can see, the resulting image is much sharper and shows a lot of detail. There is still much noise evident, but with a little more patience I should be able to stack more images to get a better result.